Tumble Dryer - How to Replace Motor Bushing Kit
Resolution

Always refer to the safety information in your product’s user manual before carrying out any repair or maintenance work. https://www.electrolux.com/support/user-manuals/

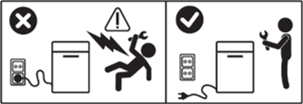
WARNING! RISK OF ELECTRIC SHOCK
Before any repair or maintenance operation, deactivate the appliance and disconnect the mains plug from the socket.
WARNING! RISK OF INJURY

Always take care when moving appliances. For heavy appliances, it is safest for two people to move them. Always wear safety gloves and safety footwear. Wear safety gloves at all times to protect against cuts from sharp edges.
WARNING! RISK OF EYE INJURY

Wear safety glasses if you perform maintenance or repair work involving springs.
WARNING! RISK OF PINCHING

Wear safety gloves if you perform maintenance or repair work involving belts.
WARNING! NOT INTENDED FOR CHILDREN

Keep all small parts and packaging out of reach of children under 3 years due to the risk of choking. Installation and use should be carried out by adults only.
-
Always empty all water from the appliance, for example from the tumble dryer water container. Any maintenance should be carried out with the appliance standing upright. Residual water could damage the electronics if the appliance is placed on its side.
Make sure to use the product only for its designated purpose and verify that it is a compatible part for the intended product.
Do not use or install the product if damaged.
Please note that self-repair or non-professional repair can have safety consequences if not carried out properly and might void the warranty. Possessing the necessary know-how is essential.
HOW TO REPLACE MOTOR BUSHING KIT
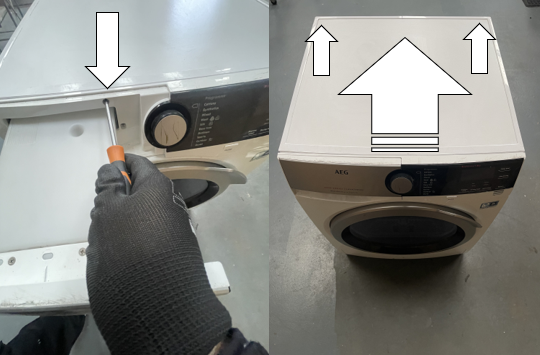
1. Unscrew the Torx 20 screw in the condenser drawer housing. Then unscrew the two Torx 20 screws on the back of the appliance lid and slide back to release.
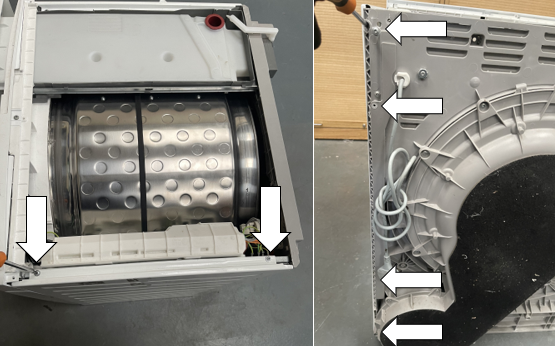
2. Unscrew the four Torx 20 screws on the back of the right-side panel and the two Torx 20 screws on the top of the right-side panel.
3. To remove the right side panel, pull the panel up and away from the body of the machine to release the panels from the securing tabs at the bottom and on the side.
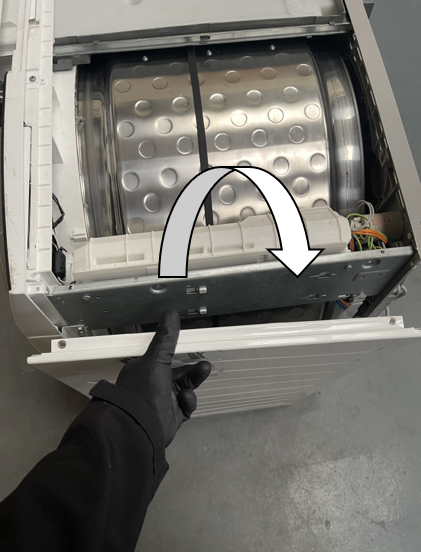
4. NOTE: When reinstalling slot the side panel into the three bottom tabs and the three side tabs to ensure the panels flush with the body of the appliance.
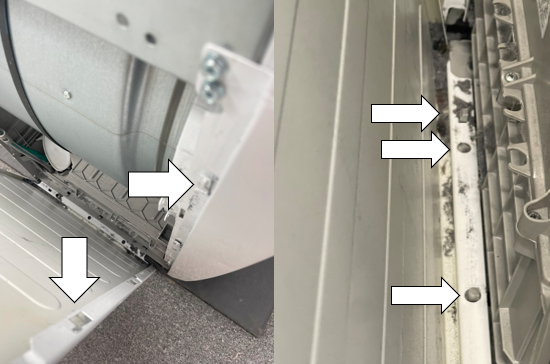
5. Unscrew the two Torx 20 screws for the capacitor and wiring housing, then pull towards you to release.
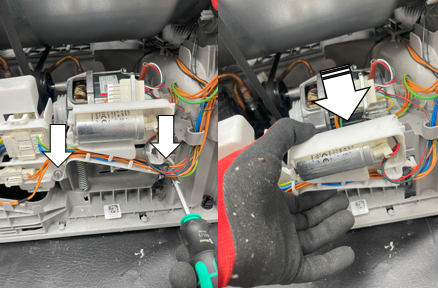
6. Carefully disconnect wiring connector from the heating element. Be careful not to damage the connector.
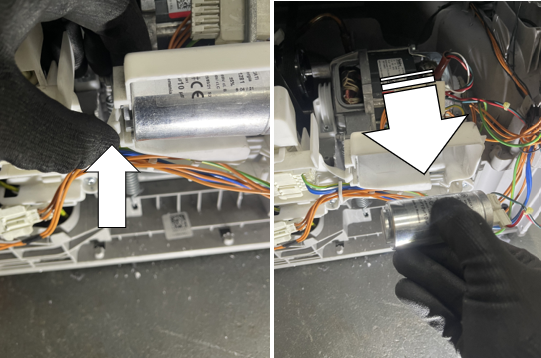
7. Carefully disconnect wiring connectors from the capacitor. Be careful not to damage the connections.
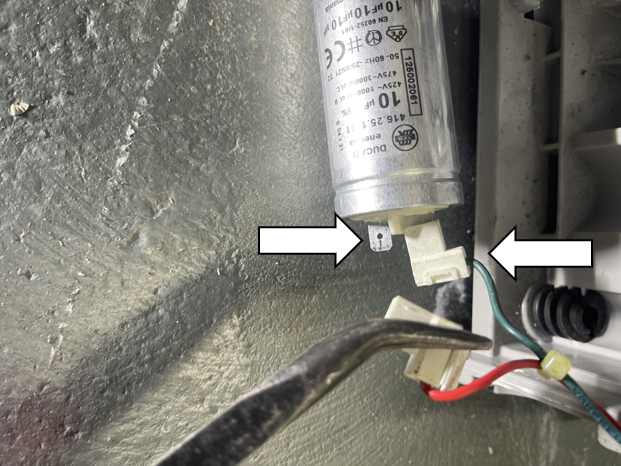
8. Carefully disconnect wiring connector from the motor. Be careful not to damage the connector.
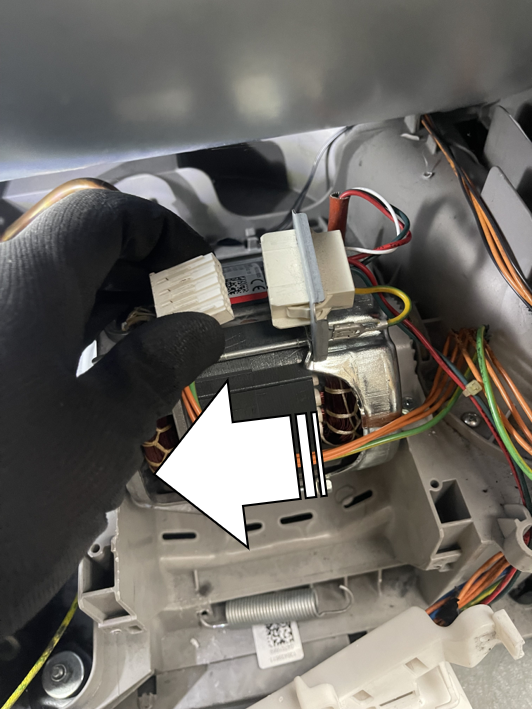
9. Twist the motor backwards to stretch the retaining spring, whilst simultaneously pulling the belt off the motor shaft to release the drive belt.
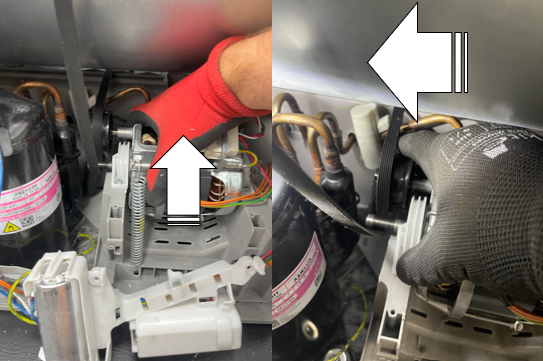
10. Unscrew the two PH2 screws that hold the two fixing brackets to the machine housing.
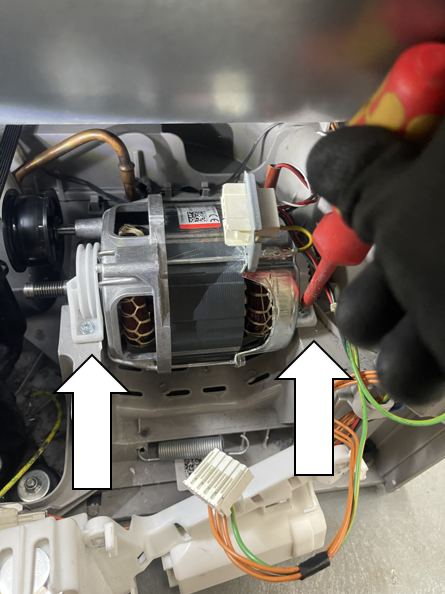
11. Lift the front of the fixing bracket up and pull towards you to unhook and release. Note: Ensure that the back of the fixing bracket is fitted securely into the retaining hole when reinstalling.
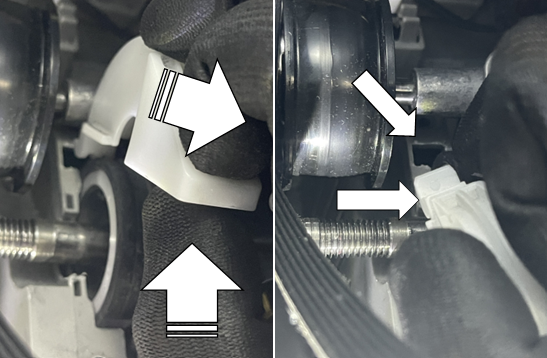
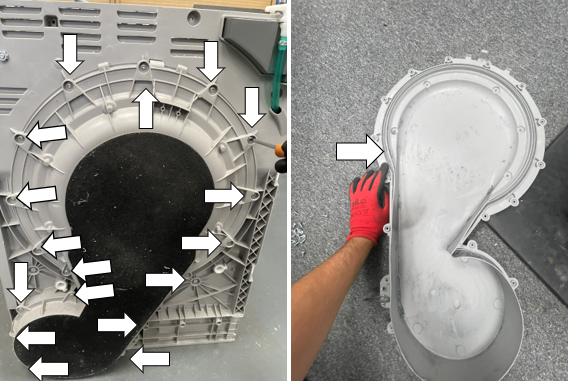
12. Unscrew the eighteen Torx 20 screws around the fan cover to release. (NOTE: Ensure that the gasket for the fan cover is correctly positioned during reinstallation).
13. Unhook the retaining spring for the motor.
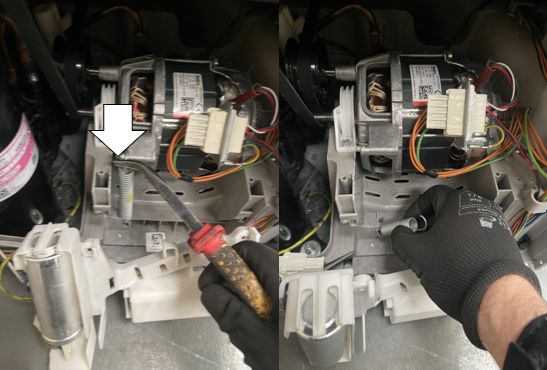
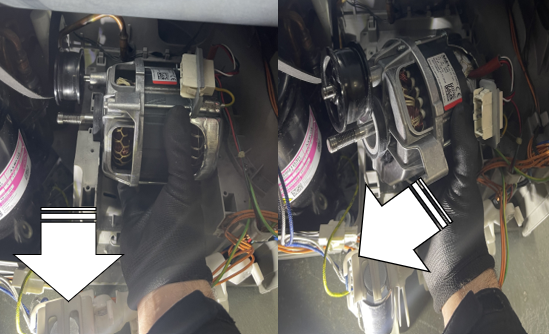
14. Lift the motor and simultaneously pull towards you and away from the appliance.
15. Remove the clamping roller from the motor and any retaining clip.
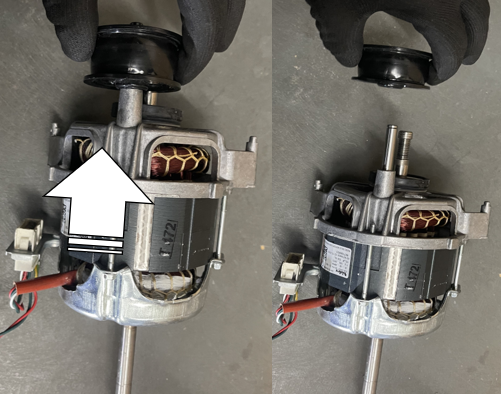
16. Remove the two motor bushings from the motor housing.
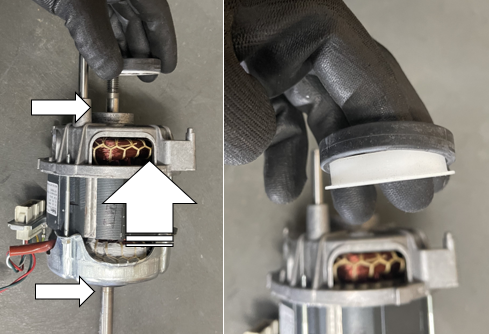
17. When assembling repeat steps in reverse order.
Was this article helpful?
Related Articles
- Tumble Dryer - How to replace heating element (4)
- Tumble dryer - How to replace Electric Valve (1)
- Tumble dryer - How to replace Electric Valve (2)
- How to replace drain pump
- How to replace door lock
- Tumble Dryer - How to replace the inverter electronic board
- Tumble dryer - How to replace the anti-interference filter
- Tumble dryer - How to replace the front panel
- Tumble Dryer - How to replace the user interface board
- Tumble dryer - How to replace the bearing assembly
Book a service
Having issues with your appliance? Book a reliable and professional service from our expert technicians to get your product up and running.
Related Articles
- Tumble Dryer - How to replace heating element (4)
- Tumble dryer - How to replace Electric Valve (1)
- Tumble dryer - How to replace Electric Valve (2)
- How to replace drain pump
- How to replace door lock
- Tumble Dryer - How to replace the inverter electronic board
- Tumble dryer - How to replace the anti-interference filter
- Tumble dryer - How to replace the front panel
- Tumble Dryer - How to replace the user interface board
- Tumble dryer - How to replace the bearing assembly